
Copic Tutorial - Watercoloring
By Colleen Schaan
Copic markers are amazing tools for coloring images, but did you know that the Copic Various Inks could also be used to add color to your favorite illustrations? Join Colleen Schaan as she teaches you coloring techniques to achieve painterly effects using Copic Various Inks and the Colorless Blender solution.
Supplies Needed:
- smooth white cardstock
- line image
- dye ink (light color)
- waterbrush
- Copic Colorless Blender solution
- Plastic paint palette
- Copic Various Inks
- paper towel
Watercolor painting is a unique style of art where paint pigments are mixed with different amounts of water and then applied to an image. The water acts as a vehicle that allows the pigment to move around and the colors to blend, resulting in a soft, tranquil look. With Copic watercolor painting, the vehicle is not water, but instead Copic Colorless Blender solution, which reacts with the solvent base of the Various Inks and gives similar results.
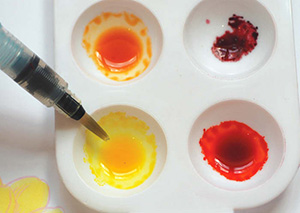
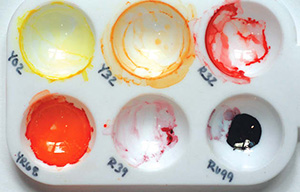
Step 1: Fill each well of the paint palette with five-10 drops of Various Ink. Pick a variety of colors from light to dark. There is no need to use natural blending groups (Y02/Y32/R32/YR68/R39/RV99) (Photo 1).

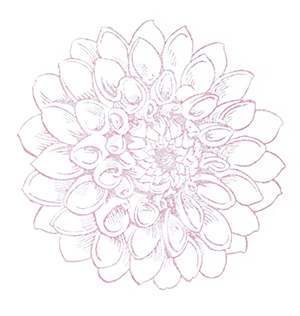
Step 2: Stamp image using a light dye ink and let dry (Photo 2).
Step 3: Fill waterbrush with Copic Colorless Blender solution. Give the waterbrush a gentle squeeze to activate fluid and wet the brush. Dip the brush into the lightest color ink (Y02) (Photo 3).
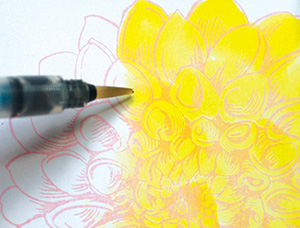
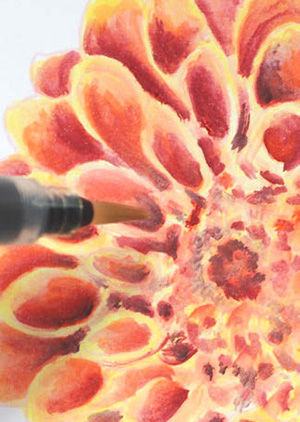
Step 4: Pick up lightest color (Y02) and paint it onto the image, continuing until the entire image is based with light ink. At this point, the color should be uneven, having areas that are light and areas that are dark (Photo 4).
Step 5: Pick up the next color from the palette (Y32) and paint it onto the image. At this stage you are just applying some base colors and you don't need to be too particular about color placement (Photo 5).

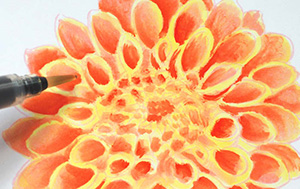
Step 6: Move on to the next color from the paint palette (R32). Apply the color to areas that you want to deepen. As the colors get darker, use less of the Colorless Blender to spread the ink (Photo 6).

Step 7: Continue adding darker shades of ink (YR68) to deepen color. By the fourth or fifth color, use very little Colorless Blender, allowing the colors to stay rich and dark with little blending (Photo 7).
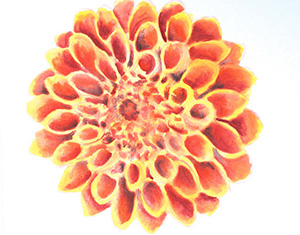
Step 8: Add the deepest colors (R39 and RV99) to the image by dabbing and flicking with the brush to allow for more contrast (Photo 8).
Tips & Tricks
- Use more Colorless Blender solution to help spread and blend lighter colors.
- To soften the colors, add more Colorless Blender solution to the brush when applying ink.
- Use less Colorless Blender solution to help keep depth and vibrancy of the darker colors and to avoid blending.
- Stamping the image with a lightcolor ink will enhance the soft watercolor appearance.
- Wipe any excess ink off waterbrush onto a paper towel before switching ink colors.
- Label the ink colors on your paint palette and keep for future use (Photo 9).
- Use watercolor paper for an even softer look.
- Paint your way to a gorgeous finished image and the perfect focal point for any greeting card (Photo 10).
Variation on Copic Watercoloring
Supplies Needed:
- glossy cardstock
- waterbrush
- Copic Colorless Blender solution
- Plastic paint palette
- Copic Various Inks
- paper towel
Use this var-iation on the Copic watercoloring technique to create beautiful backgrounds and imaginative artwork. Instead of painting an actual image, use Copic Various Inks to paint swatches of color across a page to create abstract inked art.
Step 1: Pick three-five Copic Various Inks that complement each other and place five-10 drops of ink in each well in the paint palette.
Step 2: Fill a waterbrush with Copic Colorless Blender solution. Give the waterbrush a gentle squeeze to activate fluid and wet the brush.
Step 3: Dip the waterbrush into any color of ink and swipe it across the surface of the paper. Dip and paint as desired (Photo 11).

Step 4: Wipe excess ink off waterbrush onto a paper towel.
Step 5: Dip the brush into a second color and swipe it across the surface of the paper. The more Colorless Blender used, the more the colors will move, bleed and blend (Photo 12).

Step 6: Continue adding additional colors as desired (Photo 13).

This Copic tutorial was first published in the Spring 2014 issue of CardMaker magazine. To get more information on Copic marker techniques:
- Purchase a copy of Colleen's book Copic Coloring Guide.
- Check out Colleen's blog, www.distinctivetouches.com.
- Subscribe to CardMaker magazine, where Colleen has a regular column featuring Copic marker techniques.
