
Copic Tutorial - Airbrushed Backgrounds
By Colleen Schaan
This issue is chock-full of colorful effects such as ombre blends and watercolor washes. Colleen Schaan joins the fun to share some of her favorite techniques for creating similar colorful backgrounds using the Copic® Airbrush System.
Airbrushed Watercolor
The first background technique I want to share is called airbrushed watercolor. It's a super simple technique that creates stunning results!
Materials
- Ranger Tim Holtz Distress Specialty Stamping Paper
- 2-4 Copic® markers in medium to dark shades
- Copic® Colorless Blender in spray bottle
- Copic® Multiliner black pen
- Copic® Airbrush System (ABS)
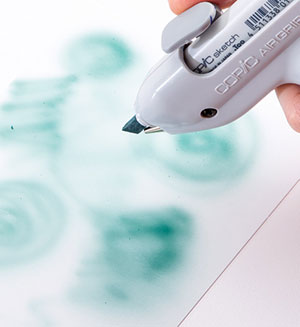
Step 1: Begin by using the airbrush to apply random swatches of one color to the paper surface. Don't worry about smooth coverage (Photo 1).
Step 2: Airbrush a second color onto the paper surface. Again, don't be concerned if the coverage isn't smooth (Photo 2).

Step 3: Continue airbrushing ink onto the surface until all white areas are covered. While the ink doesn't need to be smooth, it should be dense. To get nice, dense coverage, spray a number of thin layers of ink instead of one heavy layer.
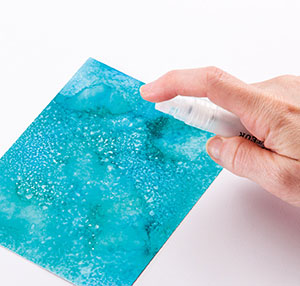
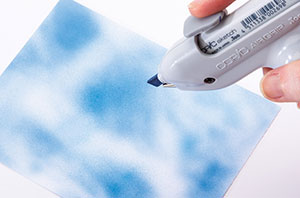
Step 4: Spritz the inked surface with Colorless Blender to move the ink around and create special effects (Photo 3).
Step 5: Continue spritzing lightly until you are satisfied with the results. You will end up with completely original and unique watercolor-like effects.
Masked Ombre
Airbrushing can also be used to create beautiful blends like this masked ombre background.
Materials
- White matte cardstock
- 3-5 Copic® markers in varying light to dark shades
- Word die cut
- Copic® Airbrush System (ABS)
- Repositionable adhesive
Step 1: Apply temporary adhesive to the back of the word or phrase.
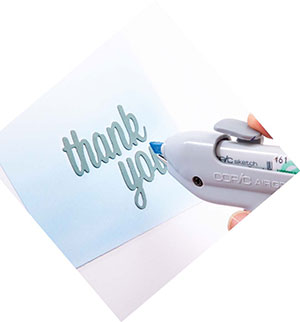
Step 2: Adhere the word or phrase to a piece of white cardstock to create a mask (Photo 4).

Step 3: Gently rub off any excess adhesive between the letters or words (Photo 5).

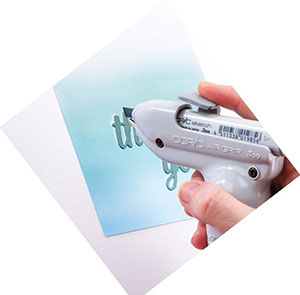
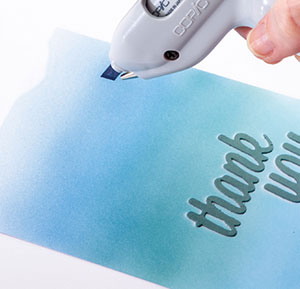
Step 4: Start by airbrushing the lightest color on the bottom portion of the cardstock. Begin at the very bottom and slowly move upward. The color should be smooth and intense at the bottom and should lighten at the top of the inked section (Photo 6).
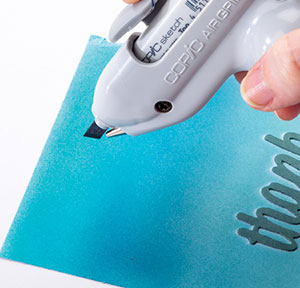
Step 5: Replace the lightest marker with a slightly darker shade. Begin airbrushing about halfway up the cardstock and steadily move downward. As the color begins to overlap the first layer, move the airbrush away from the cardstock surface to help lighten the second color. This will create a soft, blended look between the first and second colors (Photo 7).
Step 6: Replace the second marker with a darker shade and continue airbrushing. Starting near the top of the cardstock, begin airbrushing with the airbrush farther away from the surface than normal. As you move downward, move the airbrush closer to the surface to create a denser color. As you move down into the second color, pull the airbrush unit away from the surface again to lighten the ink. This will create a soft, blended look between the second and third colors (Photo 8).
Step 7: Insert the darkest marker into the airbrush unit and continue airbrushing. Starting slightly off the surface of the cardstock, begin spraying the darkest color. Slowly move downward into the third color. As you begin to overlap the lighter shade, gently move the airbrush away from the surface. This will lighten the color and help to create a softly blended look (Photo 9).
Step 8: Once you have the desired ombré results, remove the mask to reveal the word or phrase (Photo 10).

Stencil Bleaching
The last airbrushing background technique is one of my favorites; it's so easy and the results are so surprising! I like to call this technique stencil bleaching, but you might just call it fun!
Materials
- White matte cardstock
- Scrap paper
- 2 Copic® markers in dark shades
- Copic® Colorless Blender in spritz bottle
- Stencil with small to medium open areas
- Copic® Airbrush System (ABS)
- Repositionable adhesive
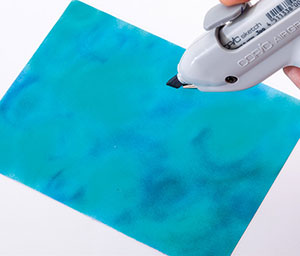
Step 1: Airbrush random swatches of color onto the cardstock surface. Don't be concerned about smooth coverage. Try to cover approximately half of the surface area (Photo 11).
Step 2: Airbrush random swatches of a second color onto the cardstock surface. Make sure to completely cover any white areas (Photo 12).
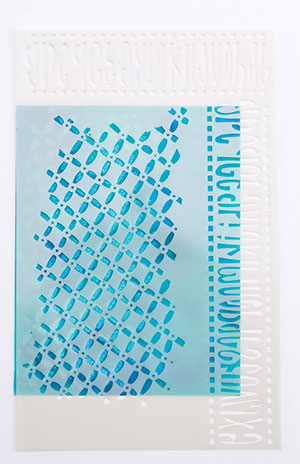
Step 3: Place a stencil over as much of the inked surface as possible (Photo 13).
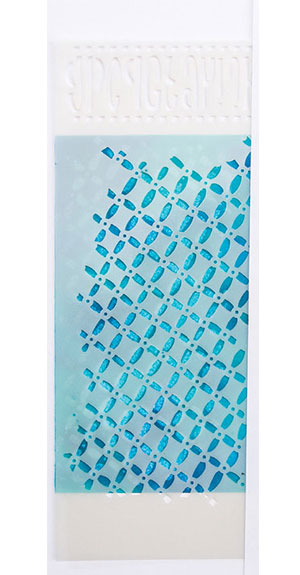
Step 4: If the stencil doesn't cover the entire piece of cardstock, mask off any uncovered areas with a piece of scrap paper (Photo 14).
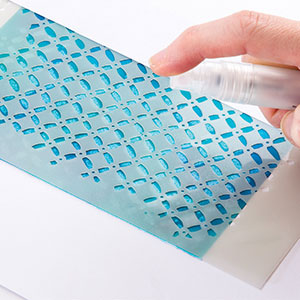
Step 5: Lightly spritz two or three times with the Colorless Blender. Let it dry slightly before repeating. If you use too much blender at once, it may seep under the stencil and ruin the design (Photo 15).
Step 6: If necessary, move the stencil to an unsprayed area and mask if needed.
Step 7: Continue applying the Colorless Blender and moving the stencil and mask until the entire surface has been bleached.
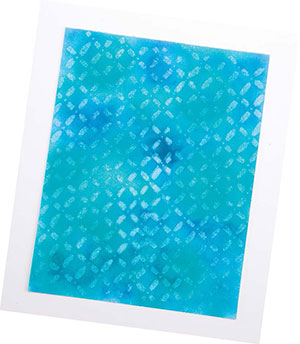
Step 8: Remove the stencil and masking to reveal the bleached pattern (Photo 16).
Tips & Tricks
- When airbrushing, a number of thin layers are better than one thick layer.
- For both the airbrushed watercolor and the stencil bleaching techniques, make sure to have a dense layer of ink on the surface.
- Medium and dark shades of ink work best for these techniques.
- Use these colorful background techniques as the focal point of your next card project.
This Copic tutorial was first published in the Spring 2016 issue of CardMaker magazine. To get more information on Copic marker techniques:
- Purchase a copy of Colleen's book Copic Coloring Guide.
- Check out Colleen's blog, www.distinctivetouches.com.
- Subscribe to CardMaker magazine, where Colleen has a regular column featuring Copic marker techniques.
