
Copic Tutorial - Coloring on Vellum
By Colleen Schaan
One of the things I love about my Copic® markers is that they make me feel like an artist, especially when I can create amazing, painterly effects by using them to color on vellum.
Supplies Needed:
- Vellum
- Line image
- Black pigment ink pad
- Clear embossing powder
- Embossing heat tool
- Copic markers: B26, C3, C5, C9, E55, E71, G29, R27, Y08, YG09
- Copic Colorless Blender
- Scratch paper
Copic Coloring on Vellum
Vellum is a smooth, translucent surface typically used as a specialty paper. Its slightly nonporous properties create interesting paintlike effects and allow Copic inks to be "erased" or removed completely with rubbing alcohol or a Colorless Blender.
To test the quality of vellum, swipe a dark Copic marker across the surface. Once the ink is dry, wipe it off with a rag saturated with alcohol or a Colorless Blender. If tiny specks of color remain, the vellum has embedded paper fibers and isn't high quality. If the ink is removed and the paper is clean, then it is a more pure vellum and of higher quality.
Use high-quality vellum to create a "Copic painting" with these simple steps:
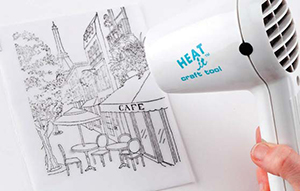
Step 1: Stamp image onto vellum using black ink.
Step 2: Sprinkle clear embossing powder onto stamped image. Gently tap off excess powder. Heat image with embossing heat tool to melt embossing powder (Photo 1).
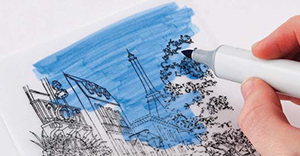
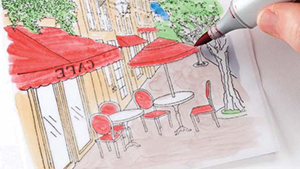
Step 3: Flip vellum over. Using B26, apply color to the sky area with long, back-and-forth strokes. Do not worry about coloring into other areas. If you want a painterly look, apply a second layer of color over the first (Photo 2).
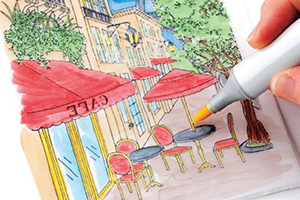
Step 4: Using the Colorless Blender marker, carefully "clean" any excess blue ink from non-sky areas (Photo 3).

Clean off nib by scribbling onto scratch paper (Photo 4).

Step 5: Base buildings with smooth strokes of E55. Base sidewalk with E71 and let dry. Add texture to sidewalk by tapping gently with E71. Base road with smooth strokes of C5 (Photo 5).
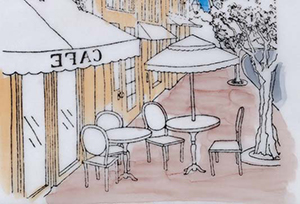
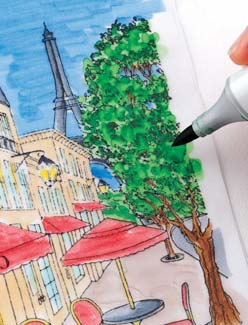
Step 6: Base leaves with scribbles of YG09 (Photo 6).
Step 7: Base awnings, chairs and umbrellas with smooth strokes of R27, coloring in the direction of the fabric (Photo 7).
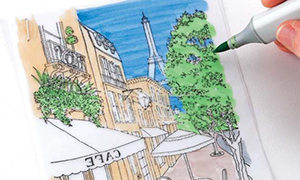
Step 8: Color tabletops, curbs, roof, lanterns, railings and tower with C9, C5 and C3. Color doorframes, lights, table and chair trim with Y08 (Photo 8).
Step 9: Add dots of G29 and YG09 to the leaves creating puddles of ink to add texture as desired (Photo 9).
Step 10: Flip image over. Add shading to buildings with smooth strokes of E55. Add shading to awnings with strokes of R27 (Photo 10).
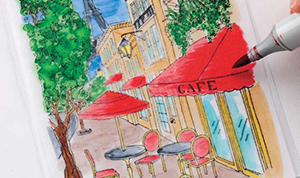
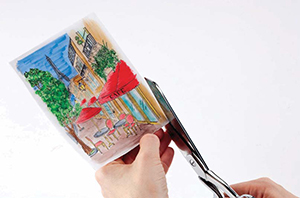
Step 11: Trim edges for completed image (Photo 11).
Tips & Tricks
- Clear embossing powder is a must; colored or metallic powders will react with Copic inks.
- Colors cannot be layered and blended on vellum with traditional techniques.
- Use long, straight strokes without lifting the nib to create a smooth look.
- Apply additional layers, scribble or tap to add texture.
- Add additional shading by coloring on both sides of the vellum.
- Use colors that are slightly darker than normal as they will appear lighter from the front side.
This Copic tutorial was first published in the Autumn 2014 issue of CardMaker magazine. To get more information on Copic marker techniques:
- Purchase a copy of Colleen's book Copic Coloring Guide.
- Check out Colleen's blog, www.distinctivetouches.com.
- Subscribe to CardMaker magazine, where Colleen has a regular column featuring Copic marker techniques.
