
Copic Tutorial - Fabric
By Colleen Schaan
Using Copic markers on fabric is a great way to add an interesting punch to any project. With a few timely tips and a bit of patience, you can be coloring up a variety of fabric surfaces.
As with papers, each type of fabric will react in a slightly different manner, so it's important to do a test swatch on the fabric of your choice before jumping into a full-fledged project. The rule of thumb is: The looser the fabric weave, the more quickly the ink will bleed; The more densely woven the threads, the less quickly the ink will bleed.
With that in mind, here are some simple steps to follow when coloring on fabric.
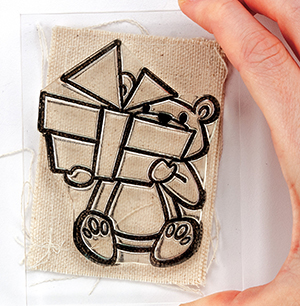
Step 1: Stamp image with VersaCraft ink (Photo 1).
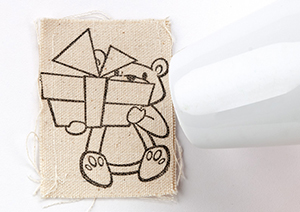
Step 2: Heat-set stamping ink until completely dry (Photo 2).
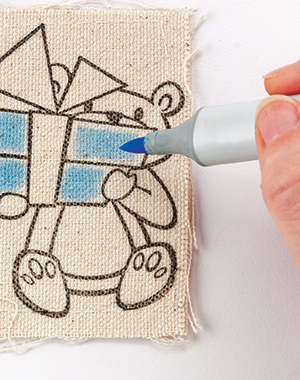
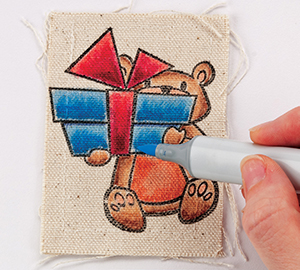
Step 3: Begin coloring each area with the lightest color. Color from the middle of the area out toward the edges. Stop before reaching the stamped lines and let the marker ink "spread" out toward them (Photo 3).
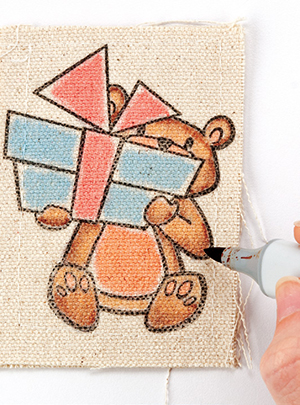
Step 4: Color each part of the image with the lightest colors first. Do not add any shading at this point. Let areas dry slightly before moving on to the next step (Photo 4).

Step 5: Add shading to small areas by using the Tip-to-Tip or Palette blending method. Pick up darker ink with the light marker and apply it to the image with flicking motions. Do not blend aggressively or the fabric will become oversaturated and the ink may bleed outside the stamped lines (Photo 5).
Step 6: Add shading to larger areas by adding flicks of darker ink directly onto the image (Photo 6).
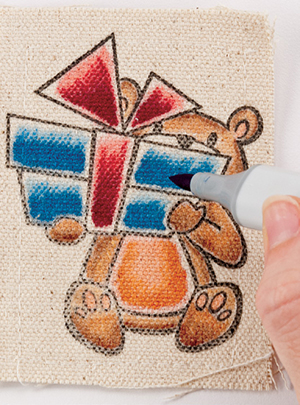
Step 7: Gently blend dark color with flicks of light ink. Do not blend aggressively or the fabric will become oversaturated and the ink may bleed outside the stamped lines (Photo 7).
Step 8: Let each area dry completely before shading an adjacent area.
- Wash fabric before using to remove any sizing.
- Make sure stamping ink is completely dry before coloring.
- Pick images with large, open spaces for less chance of bleeding.
- Let Copic ink dry slightly between layers.
- Have a heat tool handy to give a quick drying "blast" if ink starts to bleed.
- Gently tap or flick ink onto surface instead of circling.
This Copic tutorial was first published in the Winter 2013 issue of CardMaker magazine. To get more information on Copic marker techniques:
- Purchase a copy of Colleen's book Copic Coloring Guide.
- Check out Colleen's blog, www.distinctivetouches.com.
- Subscribe to CardMaker magazine, where Colleen has a regular column featuring Copic marker techniques.
