|
Half-Square Unit Techniques
Half-squares (or triangle squares) are a basic unit of quilting used in many blocks or on their own. Here are two different ways to make this simple unit. While the same-size-square technique is more common, faster and very easy to accomplish, the trim-to-true technique will give you a more accurate and sturdier unit.
Same-Size-Square Technique
This construction method works with two same-size , different-color squares and will yield two half-square units.
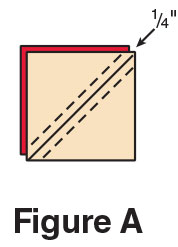
1. Add 7/8" to the desired size of the completed half-square unit. Cut two squares from different colors this size. For example, for a 3" finished half-square unit, cut three 7/8" squares.
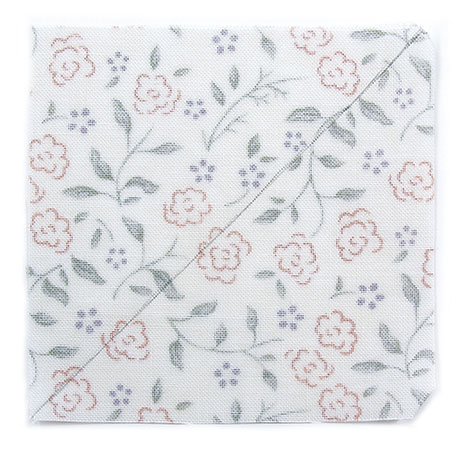
2. Draw a diagonal line from corner to corner on the wrong side of the lightest color square. Layer the squares right sides together. Stitch 1/4" on either side of the drawn line (Figure A).
|
 |
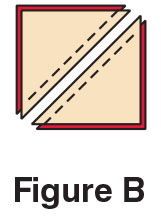
3. Rotary-cut the squares apart on the drawn line, leaving a 1/4" seam allowance and making two triangle units referring to Figure B.
|
 |
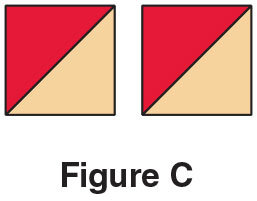
4. Open the triangle units and press seam allowances toward the darker fabric making two half-square units (Figure C).
|
 |
Trim-to-True Technique
This half-square construction method allows for quick cutting of squares, reinforced diagonal seams and rotary-trimmed units for absolute accuracy. This method for creating the units is the same as the same-size-square technique, but by starting with oversized squares, exact accuracy can be obtained when they are trimmed. Always cut and stitch a sample before cutting all your units.
1. To determine the size square needed to produce a half-square unit, add 1 1/4" to the finished square size desired for trimming ease.
2. Cut the size squares determined in the previous step from light and dark fabrics to compose the half-square units. Remember that each square yields two half-square units. The required number of cut squares from each fabric is only half the final unit tally. Note: You can layer the two fabrics with right sides together when cutting to reduce handling of individual layers.
|
 |
3. Trace an accurate diagonal line on the wrong side of light-color fabric.
|
 |
4. Layer light and dark squares right sides together; stitch an exact 1/4" on each side of the traced line.
|
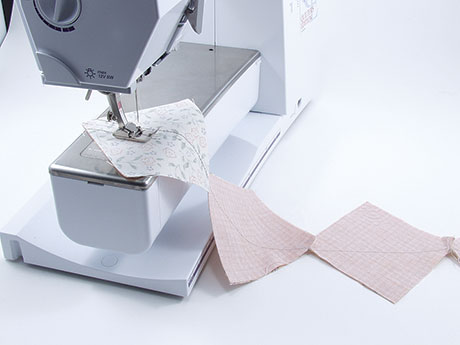 |
5. Cut between the stitching lines on traced line to separate squares into triangle units.
6. Lay units light side down on ironing board. Press each unit open, pressing seam toward dark half.
|
 |
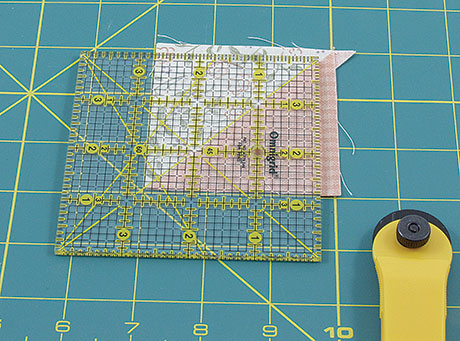
7. Place a pressed unit right side up on a cutting mat. Position a gridded square ruler over the unit, aligning the ruler diagonal guideline exactly over the seam.
|
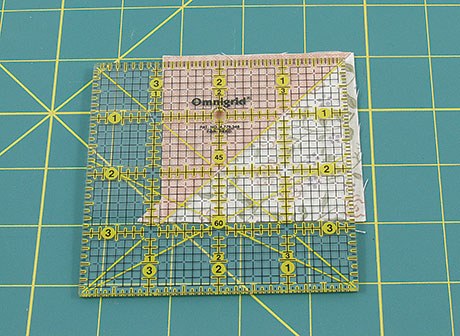 |
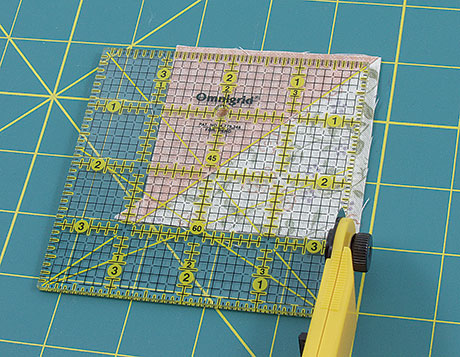
8. Adjust position so that the top two edges of the gridded square are near raw edges, with only a slight margin of fabric showing beyond the cutting edges of the ruler along the full length of each edge. Trim unit edges on the top and right edges.
|
 |
9. Rotate the unit so the two untrimmed sides are now at the top and right.
10. Position the ruler with the diagonal guideline exactly over the seam and the measurement lines for the required square size aligned exactly along the previously trimmed edges. Note: For quick reference when aligning, position a small piece of tape along the required square measurement lines on the ruler.
|
 |
11. Hold the ruler firmly in place while trimming the final two sides of the square. |
|
|
|
|
