|
Quilt-As-You-Go Blocks
Tutorial Guides
These blocks are a great project when time is short but you want to have something to work on. Keep a box of scrap strips and precut squares of batting and backing fabric ready to stitch when the opportunity arises.
This channeling technique works the same on all size blocks and is a great way to use the scraps of batting and fabric lying around your sewing room.
Completing the Blocks
1. Cut a fabric backing and batting piece at least 1/2"1" larger than the unfinished block size you want to make. For example, if making a 9 1/2" x 9 1/2" unfinished block, cut 10"11" squares. Note: Cutting these pieces larger than the desired block size allows for quilting shrinkage. You will square up the completed blocks later to make connecting the blocks easier.
2. Position the batting on the wrong side of the backing fabric, matching the raw edges.
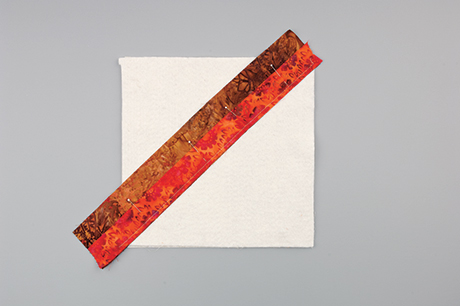
3. Select two strips of fabric any width but long enough to extend past the diagonal of the batting and backing fabric. With right sides together, pin the two strips in place diagonally across the batting/backing piece (Photo A). Stitch a 1/4" seam through all layers.
|
 |
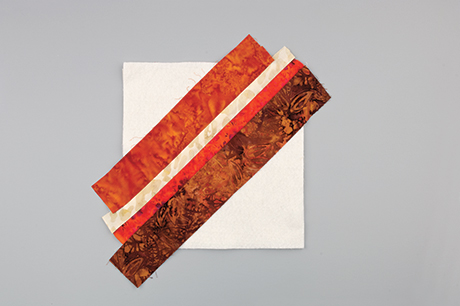
4. Press strips open. Add a third strip to the second strip referring to step 3. Press strips open and repeat (Photo B).
|
 |
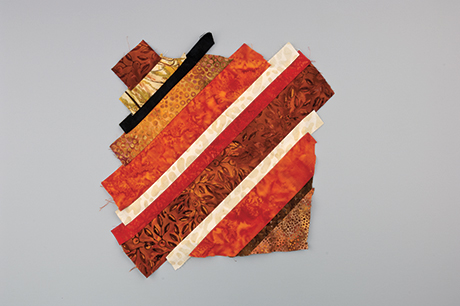
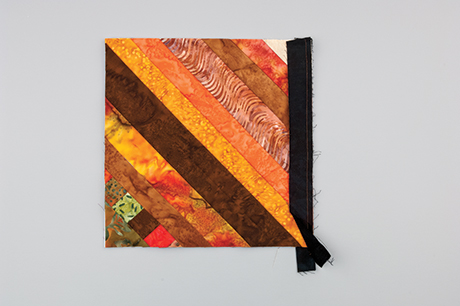
5. Continue adding strips to both sides of the first strip. Press after each strip is stitched down until you have covered the entire batting/backing piece as seen in Photo C.
|
 |
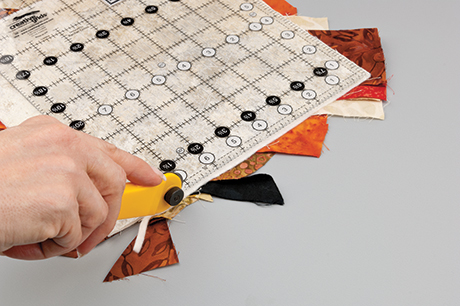
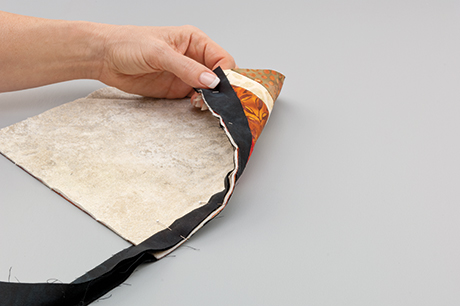
6. Square up the block from the backing side of the quilted piece to complete a quilt-as-you-go block (Photo D).
|
 |
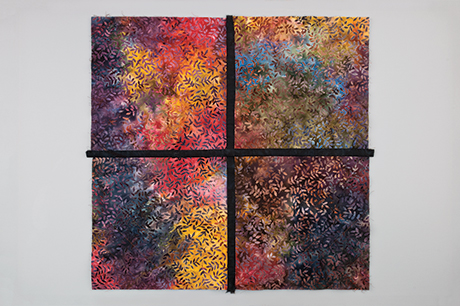
Joining the Blocks
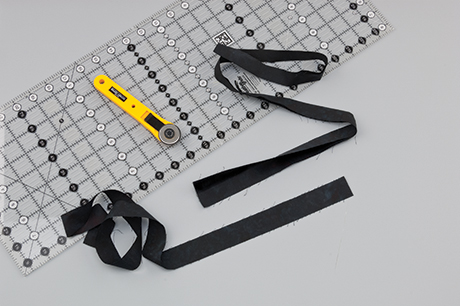
To connect the blocks you will need a fabric color that is easy to find, like black, if you will be making this over a period of time. The amount needed depends on how big you want to make your quilt. It is better to have too much than too little.
1. Trim all blocks to a consistent size.
2. Cut 1 1/8"- and 1 5/8"-wide strips by the fabric width for connecting channels.
3. Fold and press the 1 5/8" channel strip in half lengthwise wrong sides together and cut length to match block size (Photo E).
|
 |
4. Position and pin the folded strip along one edge of the back of a trimmed block with raw edges aligned (Photo F).
|
 |
5. Position and pin a 1 1/8" channel strip right sides together on the front side of the block referring to Photo G.
|
 |
6. Stitch along the edge through all layers using a 1/4" seam. Trim channel strips flush with the block edges.
7. Press the 1 1/8" channel strip toward the raw edges, extending over the block edge. Turn the block wrong side up and slip a second block right side up under the unit. Align the second block with the opposite edge of the 1 1/8" strip. Stitch in place. Note: Both right sides of the two blocks should be on the same side with a connecting channel strip in between.
|
 |
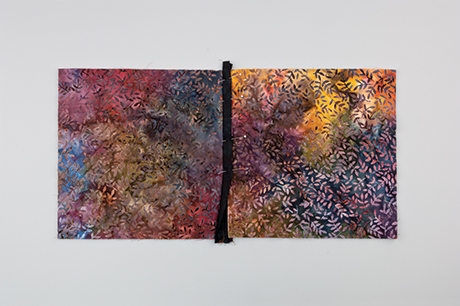
8. Flip the block unit over so that both backing fabrics are showing. Press the double-folded channel over and pin (Photo I). Use a slip stitch to sew in place to complete a two-block unit.
|
 |
9. Repeat steps 28 to make a second two-block unit.
10. To connect the two-block units, repeat the same process of adding the folded channel strip to the back of the units and the 1 1/8" strip to the front. Flip to the back and slip-stitch in place to complete a four-block unit (Photo J).
|
 |
11. Continue to make four-block units until you have the number of blocks required for your quilt. Connect the four-block units using the same channeling technique. Note: You can also attach in rows using the same technique. |
|
|
|
|
