Mitered Corner Bindings
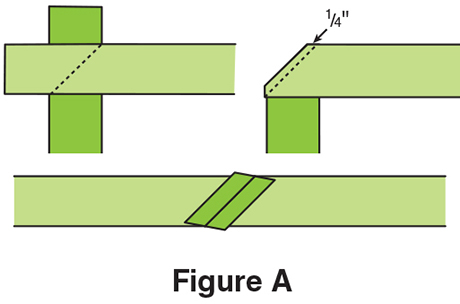
| To give your quilts a professional finish, bindings need to be smooth and fit snugly over the edges of the quilt, be invisibly hand-stitched to the back of the quilt and have mitered corners that lie flat without gaps. With a little practice, you can complete mitered-corner bindings that any quilter will smile about. 1. Join binding strips on short ends with diagonal seams to make one long strip; trim seams to 1/4" and press seams open (Figure A). |
|
 |
| 2. Fold 1" of one short end to wrong side and press. Fold the binding strip in half with wrong sides together along length, referring to Figure B; press. |
|
 |
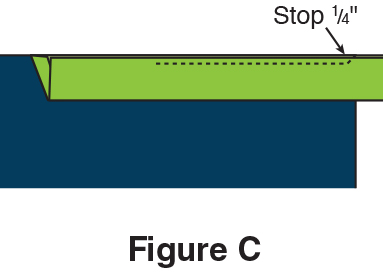
| 3. Starting about 3" from the folded short end, sew binding to quilt top edges, matching raw edges and using a 1/4" seam. Stop stitching 1/4" from corner and backstitch (Figure C). Clip thread. |
|
 |
| 4. Fold binding up at a 45-degree angle to seam and then down even with quilt edges, forming a pleat at corner, referring to Figure D. Take a stitch or two in the fold to hold the corner down. |
|
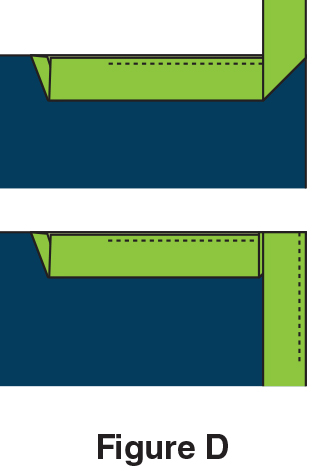 |
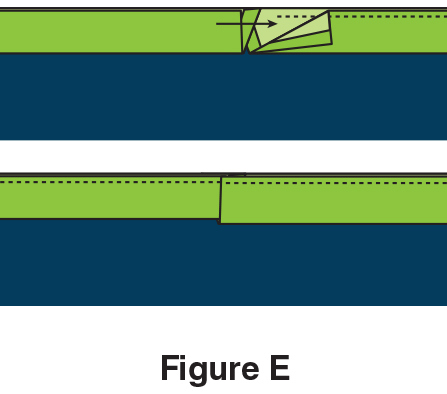
| 5. Resume stitching from corner edge as shown in Figure D, down quilt side, backstitching 1/4" from next corner. Repeat stitching to within 3" of starting point, and mitering all corners,. 6. Trim binding end long enough to tuck inside starting end and complete stitching (Figure E). |
|
 |
| 7. Fold binding to quilt back, making sure that binding is pulled snugly against quilt raw edges and covering the stitching. Stitch in place by hand or machine to complete your quilt. | |