|
Three Ways to Make Flying Geese Units
Here are three ways to easily make flying geese units for any of your quilting projects. Try each of these out to find your favorite technique. Then pick a finished size for your project and make a whole flock of flying geese!
Sew & Flip Triangles
With this method, small half-square triangles are sewn onto opposite sides of a large quarter-square triangle. The large triangle is the center of the flying geese unit and the small triangles are the “wings.”
Cutting
Use a ruler specifically designed for cutting flying geese units, or:
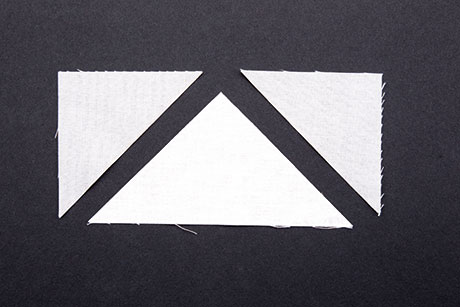
Add 1 1/4" to the desired finished width of the flying geese unit to determine the size of square needed and cut on both diagonals to make center or large triangles.
Add 7/8" to the desired finished height of the flying geese unit to determine the size of square needed and cut on one diagonal to make the "wings" or small triangles.
|
 |
Assembly
1. Place a small triangle right sides together on a short side of the larger triangle. Sew a scant 1/4" seam. Open and press to reveal the corner triangle or wing.
|
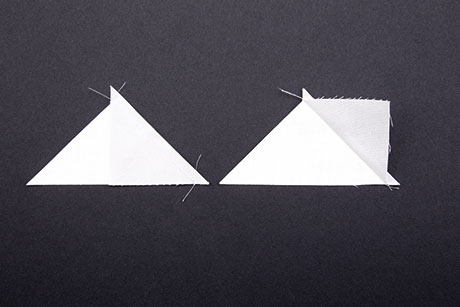 |
2. Place the second triangle right sides together on the opposite short side of the large triangle. The second triangle will slightly overlap the previous triangle. Sew a scant 1/4" seam.
3. Open and press to complete the flying geese unit.
|
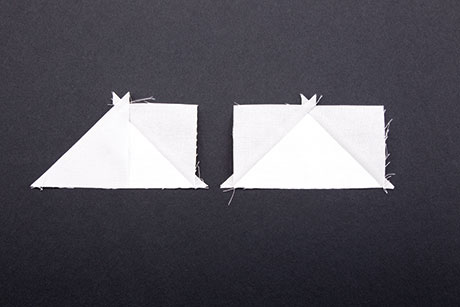 |
4. If desired, trim dog-ears and square up the finished unit to the exact size desired.
Sew, Trim & Flip Rectangles & Squares Method
With this method, squares are sewn onto opposite ends of a rectangle. The rectangle will be the center of the Flying Geese unit and the squares will become the “wings”. After sewing in place, the squares are trimmed and flipped open to create the unit. The bias edges aren’t exposed until after sewing so there is no concern about stretch and distortion.
Cutting
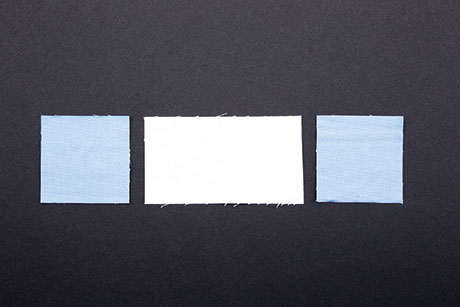
Add 1/2" to the desired finished height and width of the Flying Geese unit and cut a rectangle that size.
Cut two squares the same size as the height of the cut rectangle.
For example, to make one 2" x 4" finished Flying Geese unit, cut a 21/2" x 41/2" rectangle and two 21/2" squares.
|
 |
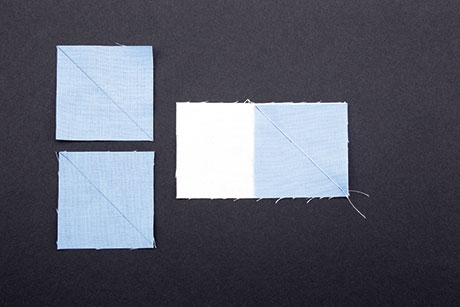
Assembly
1. Draw a diagonal line from corner to corner on the wrong side of each small square.
Place a square, right sides together, on one end of the rectangle. Sew just inside the drawn line.
|
 |
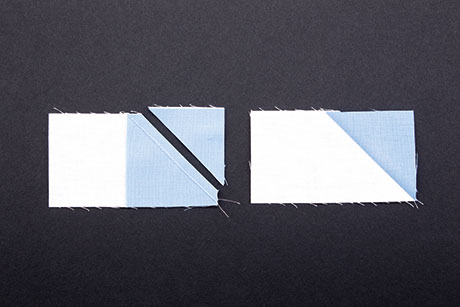
2. Using a rotary cutter, trim 1/4" away from sewn line.
Open and press to reveal the corner triangle or wing.
|
 |
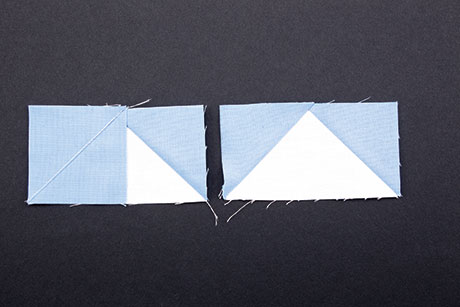
3. Place the second square, right sides together, on the opposite end of the rectangle. This square will slightly overlap the previous piece.
Sew just inside the drawn line and trim to 1/4" away from sewn line as before.
Open and press to complete the flying geese unit.
|
 |
4. If desired, trim dog-ears and square up the finished unit to the exact size desired.
Four at a Time Alternate Method
With this method, smaller squares are sewn onto opposite ends of a larger square. The unit is cut in half and additional small squares are sewn on the units. After sewing in place and cutting, the small squares are flipped open to create the flying geese unit.
The large square will be the center of the flying geese units, and the small squares will become the “wings.” The bias edges aren’t exposed until after sewing, so there is no concern about stretch and distortion.
|
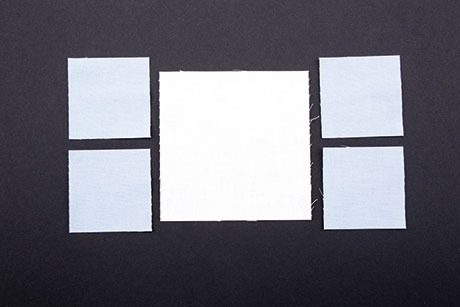 |
Cutting
Add 1 1/4" to the desired finished width of the flying geese unit and cut one center square.
Add 7/8" to the height of the desired finished flying geese unit and cut four squares.
For example, to make four 2" x 4" finished flying geese units, cut one 5 1/4" square and four 2 7/8" squares.
Assembly
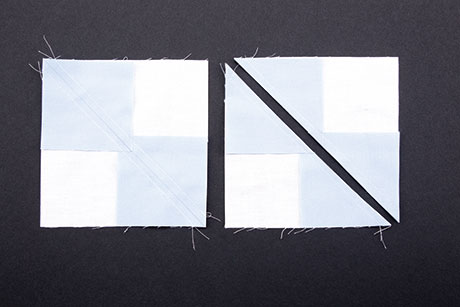
1. Draw a diagonal line on the wrong side of each small square. Orienting the drawn lines as shown in photo, position two small squares on opposite corners of the large square. The small squares will overlap slightly in the middle. Stitch 1/4" away from both sides of the marked line. Using a rotary cutter, cut on the marked line to create two units.
|
 |
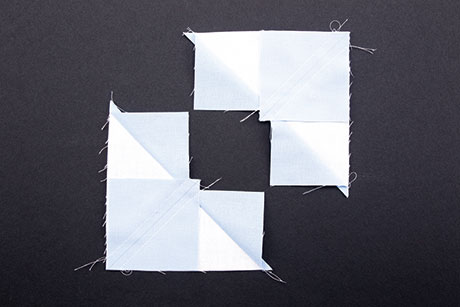
2. Press seam allowances toward the small triangles.
3. Position the remaining squares on the units as shown and stitch 1/4" away on each side of the marked line.
|
 |
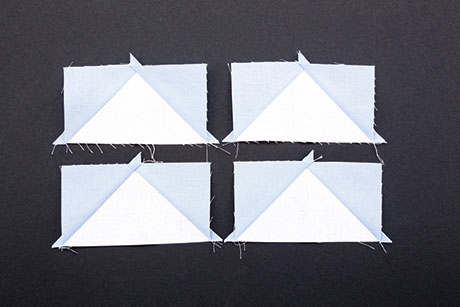
4. Cut on the marked line and press towards the triangles to create a total of four flying geese units.
|
 |
5. If desired, trim dog-ears and square up the finished unit to the exact size desired. |
|
|
|
|