
Copic Tutorial - Coloring Water
By Colleen Schaan
Join Colleen Schaan as she shares expert tips for coloring water. Her easy-to-follow approach is a must-try!
Coloring water is a fairly complex technique. Water can be affected by its surroundings, clarity, contents and depth.
In this article, we will look at one process for coloring water, breaking it down into steps based on the depth of field within an image. It isn't the only approach to coloring water and it may not be the very best, but it works well for me. I hope that you find a helpful tip or two for your own process.
Materials
- Smooth white cardstock(X-Press It Blending Card)
- Stamp image (Stampendous)
- Black dye ink pad (IMAGINE Crafts/Tsukineko Memento)
- Copic® markers: 0, B00, BG72, E79, G40, G82, RV00, RV63
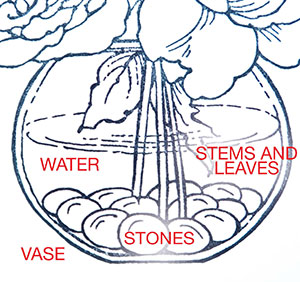
Step 1: Study the image and break it down into sections. The sections in this vase image include: the vase, the water, the stones and the flowers (Photo 1). Each of these sections can be colored individually. Thinking in three dimensions, either work from the outside of the image in or from the inside out, coloring the sections in that order (Photo 1).
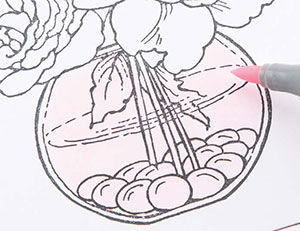
Step 2: Begin by coloring the vase with a light shade of the color of your choice. I began with light RVs. In this particular image, the vase actually consists of two parts -- the outside edges and the inside open area (half-filled with water). The inside area will be lightest because it is open and there is space between the sides. This area is colored completely with RV00. Notice that all of the areas inside of the vase are colored (Photo 2).
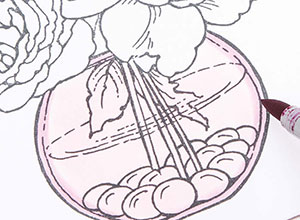
Step 3: Because of the curve along the edges of the vase, the glass will be closer to overlapping itself and will therefore be darker in shade. Here, the edges of the vase have been outlined with RV63 (Photo 3).
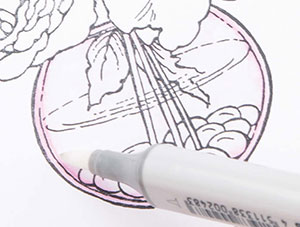
Step 4: Because the glass vase is transparent, the pink should appear transparent as well. To do this, use a Colorless Blender (0) marker and "push" the pink color out from the center toward the edges of the vase. This will lighten the pink color, but not erase it completely. It will also give a soft, mottled look that appears transparent (Photo 4).
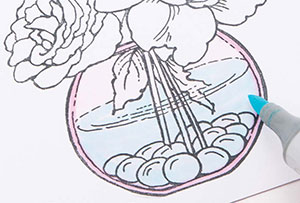
Step 5: Inside of the vase are water, stones and stems. Since the water fills the vase to the outside edges, we will work with that as the next segment in the depth of field. While water is typically clear, it will take on the properties of its surroundings. In this case, it is in a pink vase, so it will have a pink tone. To create an image that is more varied and contains more visual interest, we are going to color the water with a light blue color (B00). Remember that the vase still has a light pink tone that will be visible through the translucency of the blue color (Photo 5).
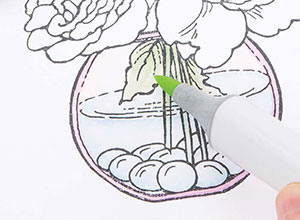
Step 6: To create the look of transparency for the water, use the Colorless Blender (0) marker to push the color to the edges of the water segment. Notice that the top surface of the water has âripplesâ where the stems enter; the blue color is pushed to the edges of those ripples as well. The stems under the water have a blue tone as well (Photo 6).

Step 7: Continuing toward the center of the image, color the stems and leaves inside the vase next. It is important to understand how new colors will be layered over previous colors to create the effect of transparency. All of the stems and leaves inside of the vase will have a slightly pink undertone. They will also be less vibrant than the leaves outside of the vase because they are being seen though another surface. Following the same concept, the stems inside the jar and under the water are even less vibrant because they are being seen through two surfaces -- the vase and the water -- and will have both subtle pink and blue tones to them. The leaves and stems inside the vase are colored with G40 and G82 above the waterline and G40 below the waterline. If the colors are too vibrant, a Colorless Blender (0) marker can be used to soften and lighten the greens (Photo 7). Note: See the finished image for a visual representation of the difference in color of the leaves inside and outside of the vase.
Step 8: The last element to color inside the vase is the stones. These stones could be any color and any substance; however, for this image we will make them a blue-green glass stone, so they will also have some transparency. As with the stems, the stones will have a slight pink tint from the vase and a blue tint from the water in addition to their original blue-green color. To create the look of glass stone, outline the edges of each stone with BG72. Add cast shadows with E79. Cast shadows help separate objects in the image and add a bit more visual depth (Photo 8).
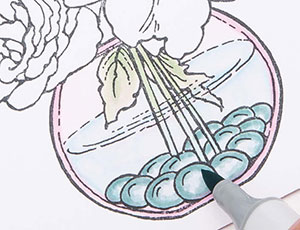
Step 9: Use Colorless Blender (0) marker to push the color from the center of each stone out toward the edge. Leave a slightly darker outline around the edge of each stone (Photo 9).
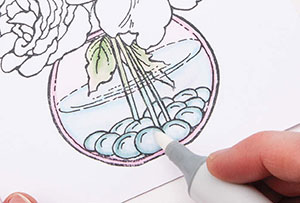
Step 10: To help portray the appearance of transparency, lightly layer RV00 over the entire area inside of the glass vase if necessary. This helps re-establish the overall pink tone of the vase.
Step 11: Color the rest of the image as usual.
Tips & Tricks
- Use light shades for easier lightening and/or moving color with the Colorless Blender.
- Select analogous colors that work well when layered for effect; avoid using complementary colors.
- Let each layer dry completely before moving on to the next section to avoid bleeding and feathering.
- Be careful not to push the dark ink lines outside of the stamped image when pushing and lightening the color with the Colorless Blender.
This Copic tutorial was first published in the Summer 2015 issue of CardMaker magazine. To get more information on Copic marker techniques:
- Purchase a copy of Colleen's book Copic Coloring Guide.
- Check out Colleen's blog, www.distinctivetouches.com.
- Subscribe to CardMaker magazine, where Colleen has a regular column featuring Copic marker techniques.
