
Copic Tutorial - Copic WIDE Markers
By Colleen Schaan
While Copic WIDE markers are most often used for coloring large areas, they can also be utilized to create great patterned effects that are perfect for simple backgrounds or single-layer cards.
Copic WIDE Markers Features
- Flat barrel
- 36 colors
- 3/4-inch-wide nib
- Broad calligraphy nib option
- Refillable ink
Check out these four fun techniques using Copic WIDE markers.
Faux Layers
If you love the look of layers, but want a clean and simple card, you can use Copic WIDE markers to create faux layers with just a swipe or two.
Materials
- White cardstock
- 2 Copic® WIDE markers
- Ruler or straight edge
- Alcohol wipes
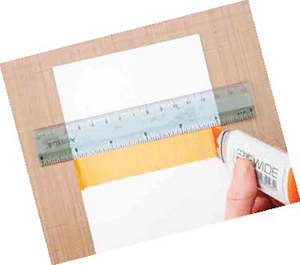
Step 1: Place the ruler across the paper. Make sure the longer portion of the angled nib butts against the bottom of the ruler. Pull the WIDE marker across the paper with a slow but steady stroke (Photo 1).
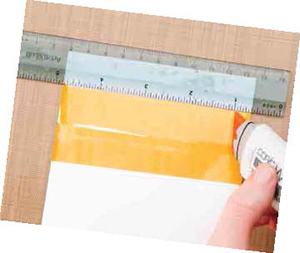
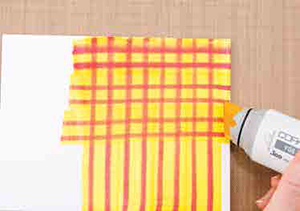
Step 2: Rotate the paper 180 degrees. Place the ruler across the paper approximately 3/4 inch above the first strip. Make sure the longer portion of the angled nib butts against the bottom of the ruler. Pull the WIDE marker across the paper with a slow but steady stroke. Do not worry if the center edges of the strips don't meet or are inconsistent in color coverage (Photo 2).
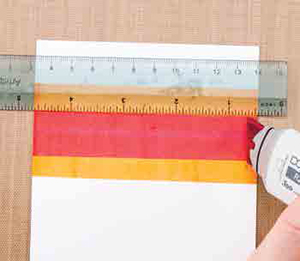
Step 3: Align the bottom of the ruler about halfway down the top stroke. Make sure the longer portion of the angled nib butts against the bottom of the ruler. Pull a different-color WIDE marker across the paper with a slow but steady stroke. Repeat if necessary to completely cover the area (Photo 3).
Tips & Tricks
- Make sure to apply even pressure along the entire stroke for more even coverage.
- Clean any excess ink from the ruler or straight edge with alcohol swabs.
- Trim the edges of the cardstock after adding faux layers for a cleaner look.
Overlapping Arcs
Copic inks are both vibrant and transparent, making them the perfect medium to layer for depth and dimension. Use this simple technique to create a lively background for your card projects.
Materials
- White cardstock
- 3 Copic® WIDE markers in coordinating colors
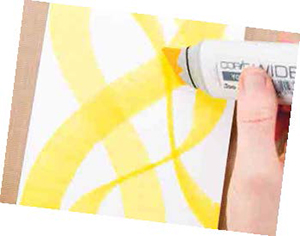
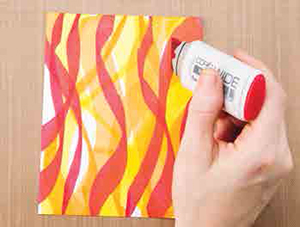
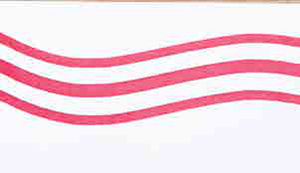
Step 1: Using the lightest marker, draw arcs, curves and bowed lines across the surface of the paper. By turning the marker, you can create thicker and thinner angles in your lines (Photo 4).
Step 2: Using a slightly darker Copic WIDE marker, continue to draw curves, arcs and bowed shapes. Be sure to overlap the lighter lines in a number of places (Photo 5).

Step 3: Repeat Step 2 with the darkest marker. To avoid covering up too much of the lighter colors, hold the marker at an angle to get thinner lines (Photo 6).
Numerous Nibs
With a 3/4-inch-wide nib, the Copic WIDE allows users to get a bit creative! Try turning the one large nib into a number of smaller nibs by snipping out various sections. Use this technique to create a number of evenly spaced lines with just one swipe of the marker.
Materials
- White cardstock
- Copic® WIDE marker
- Extra Copic® WIDE marker nib
- Stampin' Up! Paper Snips
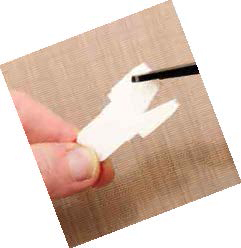
Step 1: Please use caution when attempting this step! Firmly grasp the base of the extra nib. Using a sharp pair of scissors or knife, cut out small portions of the nib. Because the nib's fibers run vertically, it is best to cut at a slight angle to avoid fraying or separating the fibers. Cut out one, two or three small segments (Photo 7).
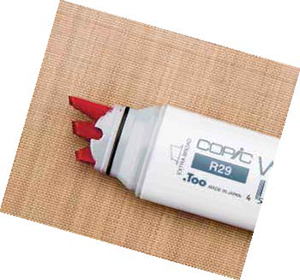
Step 2: Remove the original nib from the marker and place it in a plastic baggie or small container with a few drops of the corresponding Various Ink. Gently insert the altered nib into the marker. Add a few drops of corresponding Various Ink to saturate the nib (Photo 8).
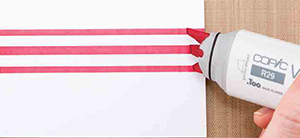
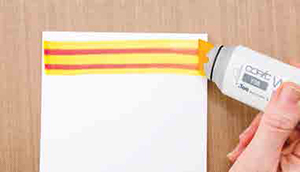
Step 3: Using a slow and steady motion, pull the marker across the paper to create multiple inked lines (Photo 9).
Tips & Tricks
- Use a ruler to create perfectly straight lines.
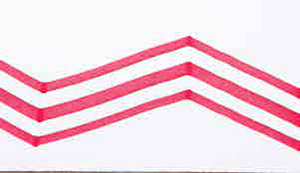
- Create curved lines (Photo 10).
- Create sharp angles or chevron designs (Photo 11).
Materials
- White cardstock
- 2 Copic® WIDE markers
- Scrap paper
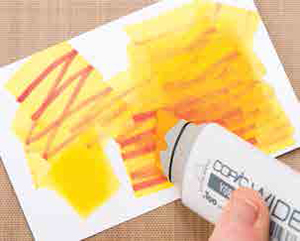
Step 1: Touch the tips of the two markers together and hold for 2 to 3 seconds. Turn the nibs perpendicular to each other for the best results. The ink from the darker marker will transfer to the nib of the lighter marker (Photo 12).

Step 2: Pull the lighter marker across the paper with a slow but steady motion. Both the light and the dark inks will transfer onto the paper surface (Photo 13).
Step 3: Repeat Steps 1 and 2 until you have covered the surface of the paper with lines (Photo 14).
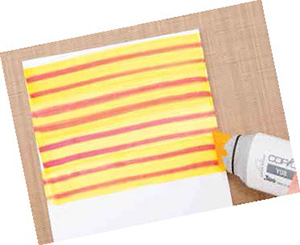
Step 4: Rotate the paper 90 degrees. Repeat Steps 1 and 2 as often as necessary to create perpendicular lines (Photo 15).
Tips & Tricks
- Use a ruler for straighter lines.
- Make sure to scribble off any excess dark ink onto scrap paper (Photo 16).
- Use Copic WIDE markers to make this cute quartet of summer greetings.
This Copic tutorial was first published in the Summer 2016 issue of CardMaker magazine. To get more information on Copic marker techniques:
- Purchase a copy of Colleen's book Copic Coloring Guide.
- Check out Colleen's blog, www.distinctivetouches.com.
- Subscribe to CardMaker magazine, where Colleen has a regular column featuring Copic marker techniques.
